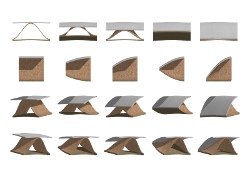
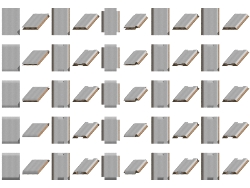
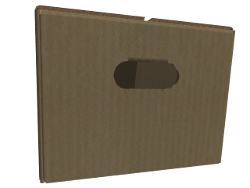
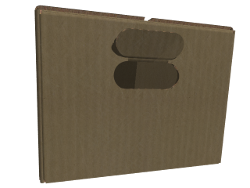
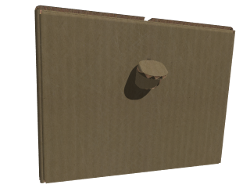
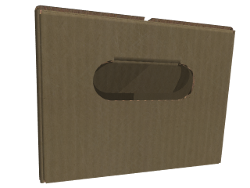
A brief history
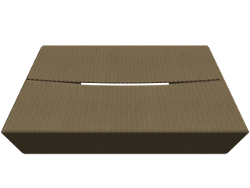
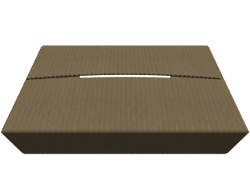
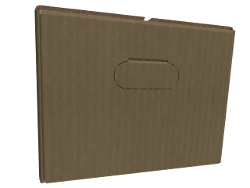
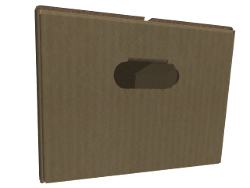
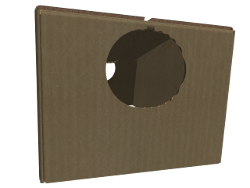
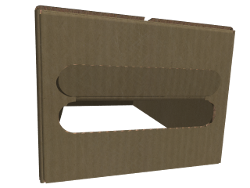
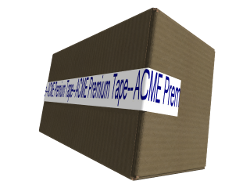
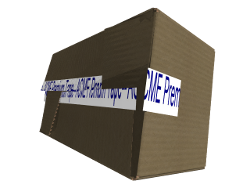
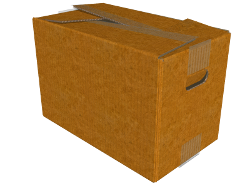
Not so long ago I needed an icon with a cardboard box. Something like this
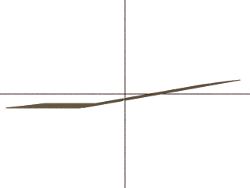
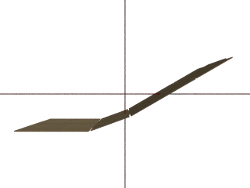
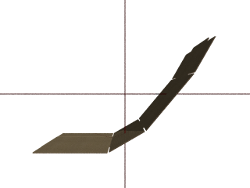
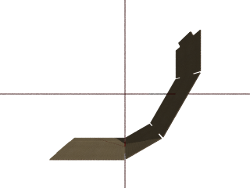
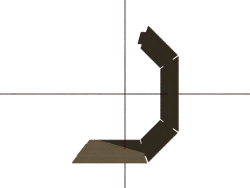
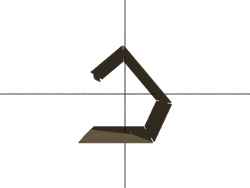
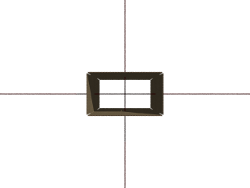
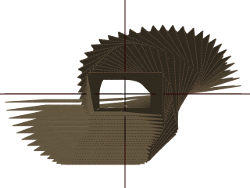
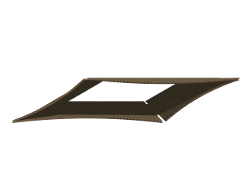
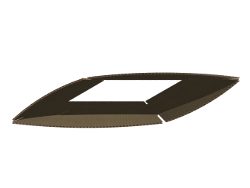
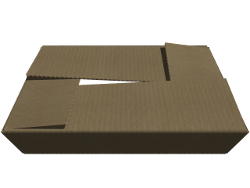
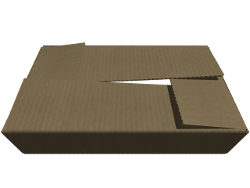
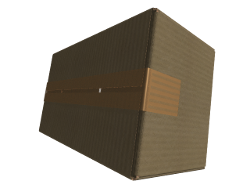
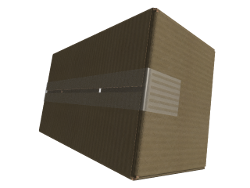
![]() . Could not find anything that fitted my needs. So, 'POV-Ray and of you go', I thought. Just like I did with the images above. I put up a bunch of tiles, rotated and translated and there it was. What an ugly box! Second attempt, it made my eyes water! Then I experimented with the few things I could find on the internet. In my opinion the results were disappointing (looking back, just for an icon, the results were more than good enough). However, the problem of constructing corrugated fiberboard boxes in POV-Ray had struck me. There was no way back. I had to deliver, in my perception. Instead of hours it took me days and instead of days it took me weeks, and a lot of them.
. Could not find anything that fitted my needs. So, 'POV-Ray and of you go', I thought. Just like I did with the images above. I put up a bunch of tiles, rotated and translated and there it was. What an ugly box! Second attempt, it made my eyes water! Then I experimented with the few things I could find on the internet. In my opinion the results were disappointing (looking back, just for an icon, the results were more than good enough). However, the problem of constructing corrugated fiberboard boxes in POV-Ray had struck me. There was no way back. I had to deliver, in my perception. Instead of hours it took me days and instead of days it took me weeks, and a lot of them.
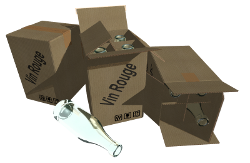
The end result is presented on this page.
At the bottom of this page you will find the link to download the Cardboard Box Construction Kit installer. It includes all the files and examples that make up the Cardboard Box Construction Kit so you can start piling up your own POV-Ray cardboard box collection.
First things first
When speaking of a box in which you can store or transport things what do we mean? Most of the time a box made of stiff paper, cardboard. Actually we mean two layers of paper with a third layer of paper swirling in between, officially called corrugated fiberboard. Sometimes it's called corrugated cardboard. In daily use most people, at least in my country, simply call a box of corrugated fiberboard a cardboard box.
So, paper based corrugated fiberboard, that's the type of material what this construction kit is all about.
To keep things simple I just call it cardboard.
Another thing you have to know is the units of measurement. The Cardboard Box Construction Kit is based on the metric system. When in POV-Ray you give a value of one (1) it means one unit on your scale (the units of measurements you are using). For the Cardboard Box Construction Kit one (1) means one meter. Why? In order to keep things in perspective (relation) to each other. Flute A size (explained later) means a thickness of 4.8 millimeters which is defined in the Cardboard Box Construction Kit as 0.0048.
Now let's say you have a scene where one (1) means one centimeter or one inch. Now what to do? Construct the box with metric values and then scale it to the units of measurement you are using.
Last but not least is how the number of flutes are handled by the Cardboard Box Construction Kit. Flutes means the number of swirls the inner layer of paper makes. This number is in relation to the thickness of the cardboard. Although not entirely correct, I calculated a ratio which comes pretty close to the actual number of flutes true cardboard has in relation to its thickness. So, when defining the thickness of the cardboard, the number of flutes per meter is calculated automatically. Taking the statement of the units of measurement, when defining a thickness of 0.0048 the macro's of the Cardboard Box Construction Kit will "see" this as a thickness of 4.8 millimeters which results in the number of 104 flutes per meter.
Cardboard Parts
Cardboard Panel Shapes
A cardboard panel
Don't be scared now!
Below is explained how to address the cardboard panel object. It's a name and a bunch of parameters. That's all!
Basic cardboard panel
Meet the cabo_panel() object:
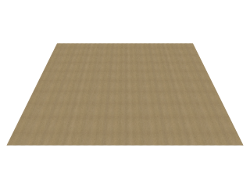
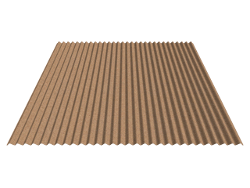
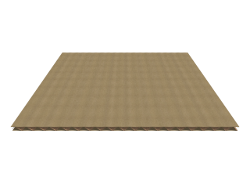
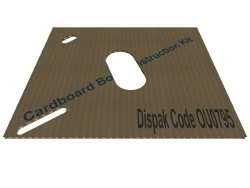
The first parameter is a constant called cabo_panel_none. This is the constant you should use when creating a piece of cardboard. For further explanation about this parameter you can read the panel types section in the Constants paragraph. Remember the statements about the units of measurement? The second parameter, < 0.0048 , 0.6 , 0.5 >, will generate a piece of cardboard 60 centimeters long, 50 centimeter wide with a thickness of 4.8 millimeters and 104 flutes per meter. I added the standard flute types (read thickness) as used in the real world as constants. By the way... The 'lines' you see in the panel surface, they do not come from the texture, they are actually there! The surface is slightly waved, just as in real cardboard. |
| ||||||||||||||||||||||||||||||||||||||||||||||||||||||||||||||||||||||||||||||||||||||||||||||||||||||||||||||||||||||||||||||||||||||||||||||||
See! Creating POV-Ray cardboard is child's play!
Text on a cardboard
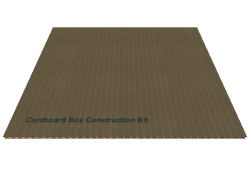
Lets start with some text on the cardboard. For that we need to construct a text array. For starters one line of text.
| #declare my_list_texts=array[1][9] | ||||
| { | ||||
| { | ||||
| cabo_panel_none | , | // Panel on which to place the text | ||
| "Cardboard Box Construction Kit" | , | // Text to place on the panel | ||
| "arialbd.ttf" | , | // Font type | ||
| "0.025" | , | // Font height | ||
| "0.025" | , | // Font width | ||
| "rgbft< 0.2 , 0.4 , 0.5 , 0 , 0.1 >" | , | // Font color | ||
| "0.05" | , | // X position, left to right | ||
| "0.05" | , | // Y position, top to bottom. When negative bottom to top | ||
| "0" | , | // Angle of rotation in degrees | ||
| } | ||||
| } | ||||
|
| ||||||||||||||||||||||||||||||||||||||||||||||||||||||||||||||||||||||||||||||||||||||||||||||||||||||||||||||||||||||||||||||||||||||||||||||||
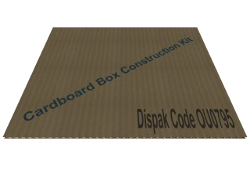
Lets do some more. The text completely across the panel and some kind of "offical" code on it. Replace the text array you copied with the one below and render it.
|
| ||||||||||||||||||||||||
Drilling holes
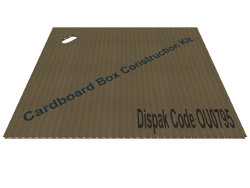
Now lets do some demolition! As with placing text, for that we need to construct an array of holes.
| #declare my_list_holes=array[1][6] | ||||
| { | ||||
| { | ||||
| cabo_panel_none | , | // Panel in which to drill the holes | ||
| "0.04" | , | // The width of the hole | ||
| "0.08" | , | // The length of the hole | ||
| "0.10" | , | // X position, left to right | ||
| "0.10" | , | // Y position, top to bottom. | ||
| "45" | , | // Angle of rotation in degrees | ||
| } | ||||
| } | ||||
|
| ||||||||||||||||||||||||||||||||||||||||||||||||||||||||||||||||||||||||||||||||||||||||||||||||||||||||||||||||||||||||||||||||||||||||||||||||
More, more, more!
|
| ||||||||||||||||||||||||||||
The remaining array's
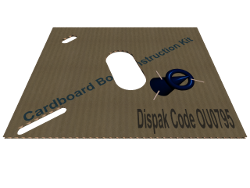
Now we are going to make a complete mess of it. We slap on an image and than nail it with some staples.
| #declare my_list_images=array[1][8] | ||||
| { | ||||
| { | ||||
| cabo_panel_none | , | // Panel on which to place the image | ||
| "LogoVEbv.png" | , | // The image to place on the cardboard | ||
| "0.04" | , | // The width of the image | ||
| "0.04" | , | // The height of the image | ||
| "0" | , | // The amount of image fading | ||
| "0.10" | , | // X position, left to right. When negative, right to left | ||
| "0.10" | , | // Y position, top to bottom. When negative, bottom to top | ||
| "45" | , | // Angle of rotation in degrees | ||
| } | ||||
| } | ||||
| #declare my_list_staples=array[3][6] | ||||
| { | ||||
| { | ||||
| cabo_panel_none | , | // Panel on which to place the staple | ||
| "0.47" | , | // X position, left to right. When negative, right to left | ||
| "0.14" | , | // Y position, top to bottom. When negative, bottom to top | ||
| "0" | , | // X axis rotation (tilting) | ||
| "30" | , | // Y axis rotation (tilting) | ||
| "0" | , | // Z axis rotation (tilting) | ||
| } | ||||
| { | cabo_panel_none , "0.49" , "0.04" , "0" , "-20" , "0" } | |||
| { | cabo_panel_none , "0.63" , "0.07" , "0" , "-70" , "0" } | |||
| } | ||||
|
| ||||||||||||||||||||||||||||||||||||||||||||||||||||||||||||||||||||||||||||||||||||||||||||||||||||||||||||||||||||||||||||||||||||||||||||||||
- In the image array element number five is the indicator of how much an image faded. The value ranges from 0.00 (fully visable) through 1.00 (not visable).
- I defined the staple with a length of 5cm and a leg length of 1.8cm. I gave it a width of 4.5mm and the staple material a thickness of 1mm.
With the above you can fool around and waste as many pieces of POV-Ray cardboard as you want. Yes, some of the options have no real use when calling the cabo_panel object directly. Meaning when you only want a piece of cardboard. However, I thought it should be available for things you want to do using your own imagination.
So, now we are going to move to the serious stuff, constructing a real cardboard box.
A Cardboard Box
Constructing a cardboard box means arranging twelve panels. Four panels for the walls, four panels for the top flaps and four panels for the bottom flaps. Placing them on a flat surface is maybe not that difficult but a box is a three dimensional object. Lets assume you want a half folded box, than what. How should you position all the panels in reference to one another? How about the flaps, open, closed or interlocked? Got the picture? Constructing a cardboard box by arranging twelve panels in a certain state with text and or holes and or images and or staples is hell. Let alone if you want to use it for an animation.
To cope with all of that I devised the cabo_box object. It can manage all of the former mentioned difficulties and more. Have no fear! Although it looks intimidating, addressing the cabo_box object is no more difficult than addressing the cabo_panel object. Again, a name and a bunch of parameters. That's it!
Your first cardboard box
Face the beast, the cabo_box object:
| object{ | |||||
| cabo_box( | // Construct a cardboard box | ||||
| < | 0.0048 , 0.45 , 0.25 , 0.30 > | , | // Cardboard thickness, box length, width and height | ||
| < | 0 , 0 , 0 , 0 > | , | // Angle back to right, right to front, front to left and left to back | ||
| cabo_flaps_long | , | // How to show top flaps | |||
| < | 0 , 90 > | , | // Length and angle back top flap | ||
| < | 0 , 90 > | , | // Length and angle right top flap | ||
| < | 0 , 90 > | , | // Length and angle front top flap | ||
| < | 0 , 90 > | , | // Length and angle left top flap | ||
| < | cabo_bend_none , 0 > | , | // How to bend the top flaps | ||
| cabo_flaps_long | , | // How to show bottom flaps | |||
| < | 0 , 90 > | , | // Length and angle back bottom flap | ||
| < | 0 , 90 > | , | // Length and angle right bottom flap | ||
| < | 0 , 90 > | , | // Length and angle front bottom flap | ||
| < | 0 , 90 > | , | // Length and angle left bottom flap | ||
| < | cabo_bend_none , 0 > | , | // How to bend the bottom flaps | ||
| cabo_texture_paper_surface | , | // Texture of the inside paper | |||
| cabo_texture_paper_inner | , | // Texture of the cardboard interior | |||
| cabo_texture_paper_surface | , | // Texture of the outside paper | |||
| cabo_grips_none | , | // Use grips on the left and right side | |||
| cabo_v5d_empty | , | // Grip height from top, length, width, left and right side angle | |||
| cabo_array_empty | , | // List of texts to place on the panels | |||
| cabo_array_empty | , | // List of images to place on the panels | |||
| cabo_array_empty | , | // List of holes to cut in the panels | |||
| cabo_tape_top_none | , | // Use tape on box top | |||
| cabo_tape_bottom_none | , | // Use tape on box bottom | |||
| cabo_v3d_empty | , | // Tape width, length from closed flap down, thickness | |||
| cabo_texture_empty | , | // Texture of the tape | |||
| cabo_array_empty | , | // List of staples to place in the panels | |||
| cabo_v4d_empty | , | // Staple length (crown), legs, width and thickness | |||
| cabo_texture_empty | // Staple texture | ||||
| ) | |||||
| } | |||||
|
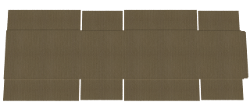
Copy and past the code above in your scene, make sure the Cardboard Box Construction Kit is included and render it. There you go! Your first POV-Ray cardboard box. See, creating a POV-Ray cardboard box is a walk in the park! Yes, I know it's a flat one. I'll teach you how to fold it next. |
|
Folding the box
The first parameter is self explanatory, the thickness of the cardboard and the box dimensions. However, there's a snag in it! Like most manufacturers, the values you pass to the cabo_box object are the dimensions of the inside opening.
Note: Length is the widest dimension of the opening into the box. Width is the smallest dimension of the opening into the box. Height is the distance into the box from the opening to the bottom of the box.
The second parameter, currently set to < 0 , 0 , 0 , 0 >, is the one that defines the angles the box walls have in relation to each other. Maybe that is not so much of a surprise but the cabo_box object will also keep the position of the box centered to the origin < 0 , 0 , 0 > at all times.
The following series of images show you what I mean. Below each image the degrees used as parameters are shown:
|
|
|
|
|
|
|
|
|
|
|
By the way, I mentioned animation, didn't I? Ok, why not. Have a look by clicking the image on the right. Keep in mind that we are only fooling around with the second parameter. The rest we did not touch, yet! |
|
Flapping the flaps
Next we are going to examine parameter three trough seven. They are there to manipulate the top flaps of you cardboard box.
Parameter three is a constant which determines if and how a flap is connected to the regarding wall panel. The cabo_box object will first construct a panel for the length of the box, than it will attach a panel for the width of the box, than attach the second panel for the length of the box and finally attach the second panel for the width of the box. Lets name this the long, short, long, short arrangement of panels. When folding the flaps inward, in order to close the box, the flap should be fitted on different positions so they can overlap each other. For that we have four constants. When using the cabo_flaps_none no flaps will be fitted on the top of each wall panel. Using the cabo_flaps_long will arrange the flaps in such a way that the flaps of the long side panels will overlap the short side panels. And yes, cabo_flaps_short will arrange the flaps so that the short side flaps will overlap the long side flaps. The cabo_flaps_equal is meant for tray like boxes in which there should be no overlap.
The following examples are about the top flaps, not the bottom flaps:
|
|
|
|
|
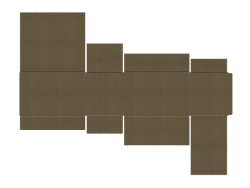
| Now parameter four through seven. They each apply to the regarding panel but are in functioning the same. You pass < A , B > for each top flap. When you set the value of A to zero the Cardboard Box Construction Kit will calculate the length of flap needed. It will take the width of the box and subtracts the thickness of the cardboard that is passed in the first parameter. The result is divided by two and that is the flap length that will be used. Any value other than zero will force the Cardboard Box Construction Kit to use that value as the actual flap length. Say you pass < 0 , B >, then the length of the flap is calculated for you. When you pass < 0.05 , B > you will get a flap with a length of 5cm. Have a look at the image on the right. On the top the third flap is calculated by the Cardboard Box Construction Kit. On the bottom the second flap is calculated by the Cardboard Box Construction Kit. There is all the freedom you need to manipulate the length of the flaps is order to create the box for your needs. |
|
|
Now the second part of the flap parameter < A , B >. Let the Cardboard Box Construction Kit deal with the length so we pass < 0 , B > for each top flap. B is the angle the flap will have to its regarding wall panel. I choose the angle of zero to be a flap that is folded inward as with a closed box, < 0 , 0 >. Thus having the flap straight up means an angle of 90 degrees, < 0 , 90 >. An angle of 180 degrees is a flap completely bend outward, < 0 , 180 >. Because each flap can have its own angle in relation to its regarding wall panel you can create all kind of scenes. Like a box half open with each flap in a little different angle. How about a crazy animation called the Cardboard Box Construction Kit 'Wave Hello' shuffle. Click on the image on the right. |
|
Bend over
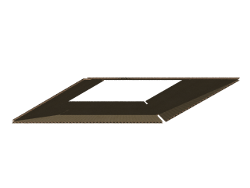
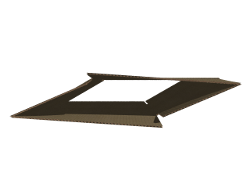
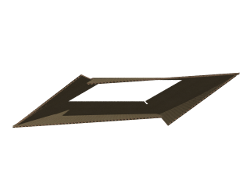
| We move over to parameter eight. This parameter steers the different ways the flaps can be deformed. Deformation as result of interlocking, denting because the box was stacked or bulging because you stuffed to many things in it. The parameter consists of two parts, < A , B >. In the first part you place one of the constants to indicate the deformation you want. For example < cabo_bend_dent , B >. On the right is an image that shows the flaps rendered using cabo_bend_none. The second part determines the precision. For example < cabo_bend_dent , 0.01 >. In POV-Ray you cannot deform an object as a whole. You have to slice it and reposition slice after slice. When designing I recommend using a value of 0.01 which mean 1cm. For a true image like the ones I present you, I recommend a value of 0.00125 which means 1.25mm. When set to zero the Cardboard Box Construction Kit will use a value of 0.02 which is 2cm. |
|
|
|
|
|
|
|
|
|
|
|
Needless to say that parameter nine through fourteen are the same as parameter three through eight but for the bottom flaps.
Getting a grip
Parameters fifteen, sixteen and seventeen are for you to decide. So we move over to parameter eighteen and nineteen.
Creating a grip within a cardboard box can be done by simply 'drilling' a hole. However, in most cases a grip is not a piece of cardboard that has been taken out but is a piece of cardboard that is bended inward.
For parameter eighteen use cabo_grips_none or cabo_grips_show to implement the use of grips.
Parameter nineteen defines the grips < distance from top , length , width , angle of left side grip , angle of right side grip >. The following series of images show you some examples. Below each image the grip definitions used as parameters are shown.
|
|
|
|
|
|
|
|
|
|
The text, image and holes array's
We already explained parameter twenty, twenty-one and twenty-two when discussing the cabo_panel object. They are array's you have to fill with the text, images and or holes you want. The only difference in using these parameters with the cabo_box object is the first identifier. When calling the cabo_panel object you have to use the cabo_panel_none constant. When using these array's with the cabo_box object you have to identify which panel to use.
Taping the box
Parameter twenty-three determines whether tape should be rendered on the top of the box. The options are on or off or you can use the constants. Parameter twenty-four determines whether tape should be rendered on the bottom of the box. The options are on or off or you can use the constants.
Parameter twenty-five passes the dimensions of the tape, < width , top-down length , thickness >. When one of these values is zero the Cardboard Box Construction Kit will use default values.
The width has a default value of 0.062 which results in 6.2cm. The top-down length, the length of the tape from the top of the box down to the bottom, has a default value of 0.08 which results in 8cm. The thickness has a default value of 0.00035 which result in 0.35mm (remember its tape).
Parameter twenty-six passes the texture that should be used as tape. I provided three of them.
|
|
|
|
|
The staples array
We already explained parameter twenty-seven, twenty-eight and twenty-nine when discussing the cabo_panel object. It is the same staple array you have to fill with the location and rotations of the staples you want to put on the box. The only difference in using these parameters with the cabo_box object is the first identifier. When calling the cabo_panel object you have to use the cabo_panel_none constant. When using this array with the cabo_box object you have to identify which panel to use.
Putting the Cardboard Box Construction Kit to work
I did a lot of writing and you did a lot of reading. After explaining all that you can do with the Cardboard Box Construction Kit it is now time to show you some true scenes that have been created using the Cardboard Box Construction Kit.
The source codes of all the examples are included in the installation program.
Furthermore, when you install the Cardboard Box Construction Kit you can select the Insert Menu option. This option will add an entry in the POV-Ray insert menu which provides all the constants and array constructions as well as a number of basic box types.
Boxes in a box
|
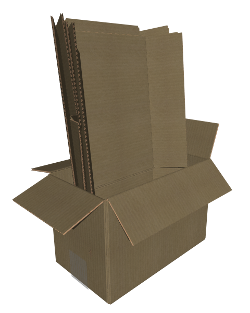
The first actual rendering of a scene with cardboard boxes. In this example I show the possibilities of folding boxes and folding the flaps. |
|
The Chicken Box
|
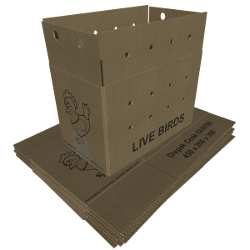
This is the rendered version of an actual picture from a cardboard box manifacturer. In this example I show the use of creating holes, the use of text and the use of images on a cardboard box. |
|
Old Weathered Box
|
Although rare, sometimes you can find them in an old shed. A cardboard box that withstood time but has its scars. In this example I show the use of tape, the use of grips, a different texture and the deformation of flaps, interlocked left in this case. |
|
Bottles in a box
|
For the bottles in this image I used the bottle.pov from Bodo Gallinat. In this example I show the use of separate cardboard panels used as the cardboard cross within the boxes to prevent the bottles from slamming against each other. |
|
My ACME Bananas Box
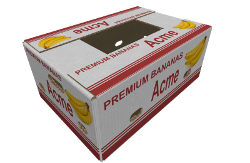
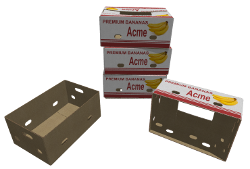
In the image on the left I show that precise use of text, holes and images is possible in order to create realistic boxes. In the image on the right I show the use of non automatic top flap length as well as the absence of either the bottom flaps (top box) or top flaps (bottom box).
|
|
|
Credit Where Credit Is Due
Yes, I created the Cardboard Box Construction Kit. But, the knowledge and some other things I needed, I found on the internet.
- POV-Ray news groups
Here I found little things, here and there, about programming in POV-Ray and the use of POV-Ray itself. - Mike Williams
I used his Isosurface Tutorial to learn more about iso-surfaces and picked up some other things along the way. - Wikipedia
To learn about corrugated materials and about cardboard itself as well. - Textures
The default cardboard textures have been created from/with the following images:- Seamless-pixels
This is the image I used for the inner part of the cardboard. - ironmike3000
I used his "17-worn-cardboard-background-sml.jpg" as the default paper texture and "47-vintage-paper-background-sml.jpg" for the creation of the "Old Wheathered Box". - White paper
I used the "386_tile_WatercolorPaper.jpg" for the white box texture. I found this image in a lot of places for free textures but in all cases the image did not contain information about the author. - The Chicken
This image is used for the "Live Birds" box. The image does not contain information about the author. Funny to mention is that I found a cardboard box company that actually uses this image on their boxes.
- Seamless-pixels
- Denis A Serikov
He created a special font with cardboard box symbols called NoticeStd.otf. - Bodo Gallinat
I used his bottle.pov for the wine- or milk bottle in the Bottles in a box image. - Gimp
I used Gimp for creating some of the box symbol images using the NoticeStd font.
A programming error
|
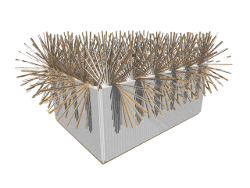
While building the flap deformations interlock-left, interlock-right, bend and bulge, I made a programming error that generated an unexpected result. I dubbed it "Shredder Panic". |
|
Download the Cardboard Box Construction Kit
Before downloading the Cardboard Box Construction Kit I would like you to consider, so no obligation, to make a donation. Why? To inspire me to:
- create more box shape types (corrugated trays, full over lap, roll end tuck top and other exotics),
- implement box abuse options like damaged surfaces and ripped flaps,
- create more human like taping (not a straight line),
- create more types of box deformations (not only the flaps),
- create double and triple wall corrugated cardboard handling,
- create box binding/strapping option,
- create various box interiors (like the cross in the bottles example),
- cleaning up the code,
- optimizing the code,
- correct errors when found.
Have fun! |
It's not the amount that counts but the fact you do, thanks.
|
Constants in use
In this paragraph all the constants present in the Cardboad Box Construction Kit are summed up and explained. You'll need them for creating a cardboard panel using the cabo_panel object or when creating a cardboard box using the cabo_box object.
Panel types
When using the cabo_panel object only the first constant cabo_panel_none is relevant. It instructs the cabo_panel object to treat all other parameters you pass for a neutral cardboard panel. The other constants are for the cabo_box object or when you want to create some type of cabo_box object yourself. They are to be used with the text and other arrays to indicate which text, hole, image or staple should be placed on which part of a cardboard box.
| Constant | Description |
| cabo_panel_none | Plain panel of cardboard. |
| cabo_panel_back | Back panel of a box. |
| cabo_panel_back_top | Back top flap of a box. |
| cabo_panel_back_bottom | Back bottom flap of a box. |
| cabo_panel_right | Right panel of a box. |
| cabo_panel_right_top | Right top flap of a box. |
| cabo_panel_right_bottom | Right bottom flap of a box. |
| cabo_panel_front | Front panel of a box. |
| cabo_panel_front_top | Front top flap of a box. |
| cabo_panel_front_bottom | Front bottom flap of a box. |
| cabo_panel_left | Left panel of a box. |
| cabo_panel_left_top | Left top flap of a box. |
| cabo_panel_left_bottom | Left bottom flap of a box. |
Flute types
Flutes indicate the number of swirls the inner layer makes. You can use any thickness you want and the Cardboard Box Construction Kit will calculate the number of flutes needed. However, there are standard flute types of which we defined the following as constants.
| Constant | Description |
| cabo_flute_A | Thickness 4.8mm, 108 +/-10 flutes per meter. |
| cabo_flute_B | Thickness 3.2mm, 154 +/-10 flutes per meter. |
| cabo_flute_C | Thickness 4.0mm, 128 +/-10 flutes per meter. |
| cabo_flute_E | Thickness 1.6mm, 295 +/-13 flutes per meter. |
| cabo_flute_F | Thickness 0.8mm, 420 +/-13 flutes per meter. |
Cardboard edges
The following constants are for use with the cabo_panel object only. They indicate how the front, back left en right side edges of a cardboard panel should look like. The cabo_box object uses these constants also but on it self.| Constant | Description |
| cabo_end_open | A straight and open end. |
| cabo_end_squeeze | The top and bottom of the cardboard slightly bend inward. |
| cabo_end_half | The top of the cardboard bend inward to half of the thickness. |
| cabo_end_closed | The top and bottom bend inward to half of the thickness. |
| cabo_end_full | The top of the cardboard bends inward closing the board. |
Flap connection
In order to attach flaps to either the top or the bottom and to indicate how the flaps should be handled regarding folding the following constants should be used.| Constant | Description |
| cabo_flaps_none | No flaps will be attached. |
| cabo_flaps_long | Long side flaps will overlap the short side flaps. |
| cabo_flaps_short | Short side flaps will overlap the long side flaps. |
| cabo_flaps_equal | Long and short side flaps will be positioned the same (for tray like boxes). |
Flap deformation
In order to indicate whether the flaps should be straight or should be deformed you can use the following constants.| Constant | Description |
| cabo_bend_none | No deformation will be applied. |
| cabo_bend_bulge | Outward deformation. |
| cabo_bend_dent | Inward deformation. |
| cabo_bend_lock_l | Interlocking flaps counter clock wise. |
| cabo_bend_lock_r | Interlocking flaps clock wise. |
Grips
In order to indicate whether to place grips in the box side panels you can use the following constants.| Constant | Description |
| cabo_grips_none | No grips will be placed. |
| cabo_grips_show | Grips will be placed in the side panels |
Tape
In order to indicate the use of tape, either on the top or bottom of the box you can use the following constants.| Constant | Description |
| cabo_tape_top_none | No tape will be placed on the top of the box. |
| cabo_tape_top_show | Tape will be placed on the top of the box. |
| cabo_tape_bottom_none | No tape will be placed on the bottom of the box. |
| cabo_tape_bottom_show | Tape will be placed on the bottom of the box. |
Default textures
To make live easier so you can start right away the following constants are there for your convenience. You can use them, you don't have to.
| Type | Constant | Description |
| Paper | cabo_texture_paper_inner | A rough stiff looking texture for the cardboard inside. |
| Paper | cabo_texture_paper_surface | The smooth texture for the cardboard outside. |
| Paper | cabo_texture_paper_old | An old whethered texture for the cardboard outside. |
| Paper | cabo_texture_paper_white | A white texture for the cardboard outside. |
| Tape | cabo_texture_tape_beige | Slightly transparent beige texture as tape. |
| Tape | cabo_texture_tape_transparant | 'Standard' transparent texture as tape. |
| Tape | cabo_texture_tape_acme_white | A white background with 'ACME Premium Tape' text as tape texture. |
| Staple | cabo_texture_staples_copper | Copper colored staple texture. |
| Staple | cabo_texture_staples_metal | Metal colored staple texture. |
Default parameters
These constants can be used when you do not want or do not know what to use.
| Type | Constant | Description |
| Texture | cabo_texture_empty | An empty texture. |
| Array | cabo_array_empty | An empty array. |
| Vector | cabo_v3d_empty | A three dimensional empty vector, <0,0,0>. |
| Vector | cabo_v4d_empty | A four dimensional empty vector, <0,0,0,0>. |
| Vector | cabo_v5d_empty | A five dimensional empty vector, <0,0,0,0,0>. |
